


Table of Contents
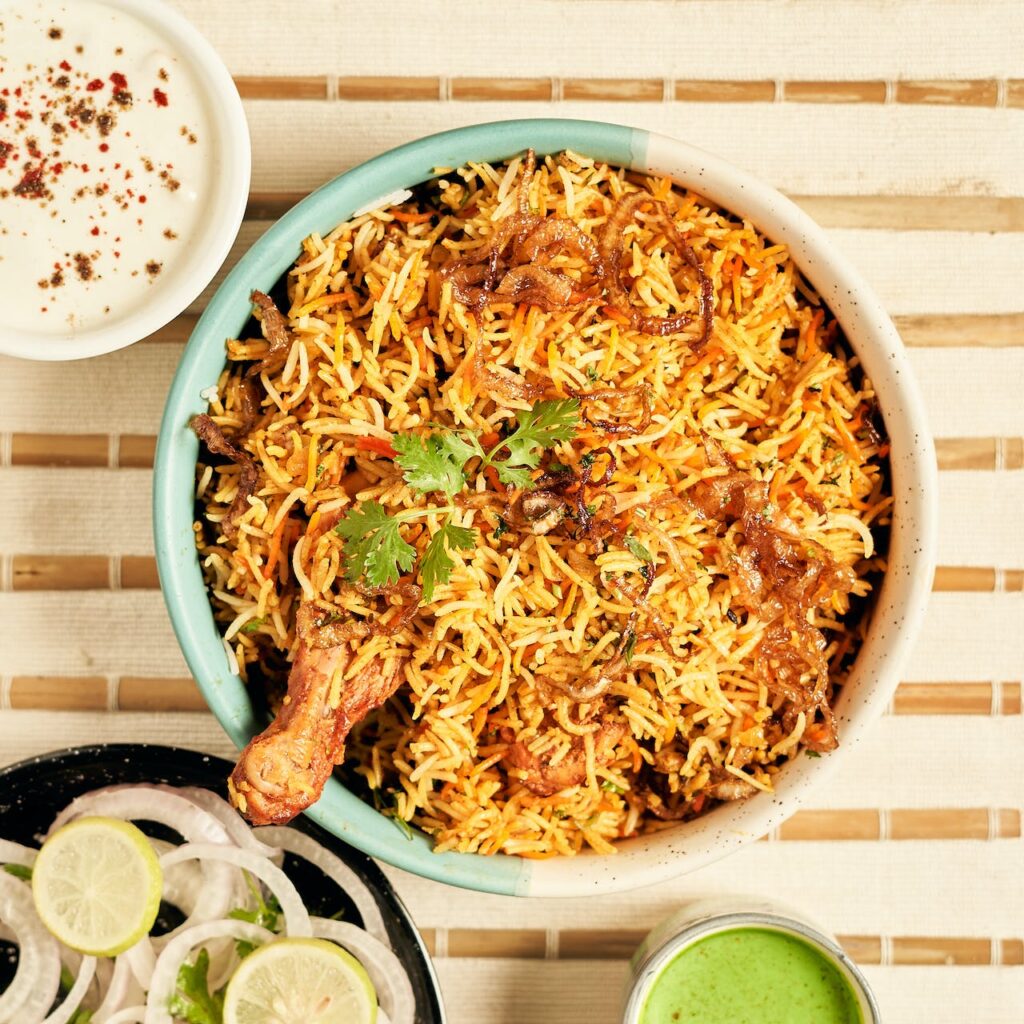
Recipe for Chicken Hyderabadi biryani – Hyderabadi biryani with Chicken is quite easy to make at home, and this recipe is ideal for making it. Since there is no need to sauté the meat or spices, this is the easiest biryani to make. Merely let the meat marinate in the spices and other ingredients. Cover with a layer of half cooked basmati rice. Cook using a slow Dum method, capturing the steam to hold on to the fragrance.
Use all of the ingredients listed to get the true taste and flavor of biryani; if you’d like, you can use ghee in place of oil. Readers of this blog have loved this recipe for Chicken Hyderabadi biryani, which is among the best I have made in years. It’s so simple that even someone with no experience could try it with no problems. This is a Biryani called Kacchi Gosh Ki Chicken Hyderabadi Biryani, where the marinated raw meat is stacked over partially cooked rice. The key to making the most of this dish is to marinate the chicken properly, which mainly helps in flavoring it and produces juicy, tasty, soft, and delicious chicken. For the most flavorful Chicken Hyderabadi biryani, marinade it the night before and refrigerate.
How to Make Chicken Hyderabadi Biryani.
Preparation
1. In a bowl for mixing, 2/3 cup (165 ml) yogurt, ¾ teaspoon salt, 1 to 1½ teaspoons of red chili powder, 1 to 1½ teaspoons of biryani masala, ¼ teaspoon of turmeric, 2 slit green chilies, 1¼ tablespoons of ginger garlic paste, and ½ teaspoon of cardamom powder should all be added to a mixing bowl. Here, sour curd should not be used.
2. Include 1 tsp of lemon juice. Don’t add lemon juice if your curd is even a little sour.
3. Combine them all and sample the marinade. If necessary, add extra salt. I needed to use one more half tsp.
4. Include and marinade the chicken. After covering the bowl, let it in the refrigerator for at least two hours or overnight.
5. The chicken that has been kept overnight becomes extremely tender and juicy. I would advise keeping the pieces too small to medium in size and not extremely huge if you are only marinating it for two hours.
Fry Onions for Chicken Hyderabadi Biryani
6. If you’re using store-bought fried onions, omit this step. You can do this the night before or right before you start preparing the biryani. Carefully and uniformly slice one big onion. Divide the layers. In the same pot that you plan to make the biryani, preheat ¼ cup ghee. Add the onions to the hot ghee and make sure they are well distributed. Fry them evenly until they become crisp, golden, and fragrant. To brown them uniformly without burning, keep stirring them constantly. Once brown, take them out and place them aside. Avoid over-frying them as they rapidly become bitter.
7. Add three tablespoons of hot milk to a large grain of saffron to absorb it. Just before putting the rice, do this.
8. Wash rice three times or more. Note that the only rice that makes a nice biryani is got older, premium basmati.
Prepare the rice for Chicken Hyderabadi Biryani.
9. Add new water and let it rest for thirty to forty minutes. To find out how long to absorb water, consult the rice bag.
10. After 30 to 40 minutes, drain. Put this away.
11. Fill a large pot with boiling water and add all the entire spices along with a ½ teaspoon of salt. Pour 1 tsp oil as well. The water must taste salty, so stir and verify the salt content. If not, taste and add additional salt as needed. If you would rather not to taste the spices, you can place all of the spices in a muslin cloth and tie it up in a knot. Give the water five minutes to simmer. Next, quickly bring it to a boil.
12. Include drained and soaked basmati rice.
13. Cook the rice until ¾ of the way through on medium-high heat.
14. The rice has to be slightly undercooked so that it is chewy and has a bite to it.
15. Transfer the drained rice to a colander.
16. Transfer the chicken marinade to the heavy-bottom pot you used to sauté the onions while the rice water is coming to a boil. I used my heavy bottom, 6-and-a-half-liter pressure cooker pan. Add two tablespoons of coriander and two tablespoons of mint leaves, along with half of the fried onions. Add the oil or ghee (we used 4 tablespoons to cook the onions).
17. Combine them together and level the chicken so that it forms a single, even layer.
18. Arrange the cooked rice half on top of the chicken. The rice has to be damp, not dripping wet. It also shouldn’t be dry. Keep some of the fried onions aside for later and add a few more. One tablespoon of coriander and one tablespoon of mint should be sprinkled; save a few extra for later. A few of pinches to four more biryani masala should be added.
19. Spread out the remaining rice once more.
20. Sprinkle with the remaining fried onions, coriander, mint, and biryani masala. Pour the milk with saffron.
21. Finally, spread with two tablespoons of ghee. You won’t get the true flavor if you use oil here, please.
How to Dum Chicken Hyderabad Biryani.
22. Method 1: Seal the rim of the chicken Hyderabadi biryani pot with foil or a damp towel. The fabric needs to be wet and thick. Distribute it across the edge. After positioning a heavy lid, align the borders of the fabric with the middle.
23. Method 2: Seal the rim thoroughly with foil. Alternatively, form dough and adhere it to the pot’s rim. Put a thick lid on it.
24. Set a griddle or old tawa on the burner. It must be a medium-high flame. Use of a dosa tawa or non-stick pan is not advised. I used a cast iron pan that I don’t think is suitable for preparing dosa. The flame must span the pan’s surface.
25. Set the pan of biryani over the tawa. Cook for 15 to 20 minutes over a medium-high heat. Cook for a further fifteen minutes after lowering the heat to extremely low. Turn off the stove and give it a minimum of twenty minutes to rest.
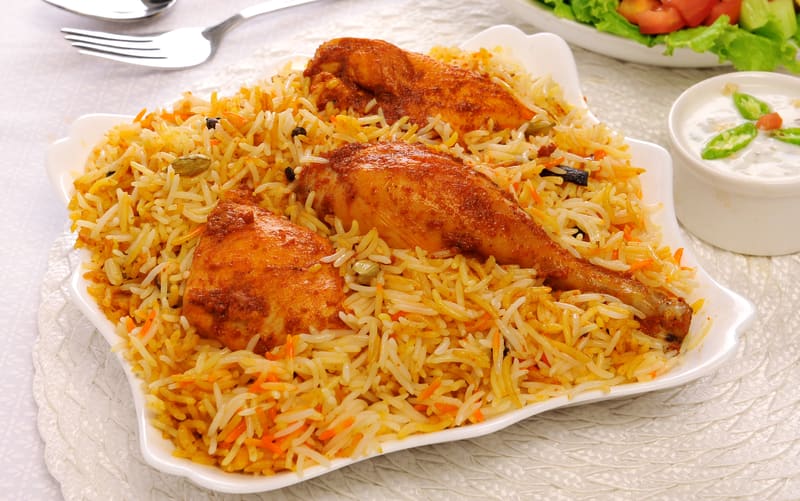
26. The Chicken Hyderabadi biryani should be completely dry after cooking. Return the lid and cook until the food is done if you see that it is very wet. Gently fluff up the rice. Layers of Chicken Hyderabadi biryani should be served with raita or shorba.
CHICKEN HYDERABADI BIRYANI INGREDIENTS (US CUP = 240ML)
1 ½ cups basmati rice (aged) ½ kg chicken (preferably thighs & drumsticks)
¼ to ½ teaspoon biryani masala (gram masala for layering)
1 large onions or ⅓ cup fried onions store bought
4 tablespoons coriander leaves (cilantro, finely chopped, 2 tbsps + 1 tbsp + 1 tbsp divided)
4 tablespoons mint leaves (pudina, finely chopped, 2 tbsps + 1 tbsp + 1 tbsp divided)
4 tablespoons oil (or ghee)
2 tablespoons ghee (clarified butter)
¼ teaspoon saffron strands (kesar, soaked in 3 tbsps hot milk)
Marinade
1¼ tablespoons ginger garlic paste
¼ teaspoon turmeric 1 to 2 green chilies slit
⅔ cup yogurt (fresh curd) (or 165 ml or ½ cup + 3 tbsp)
1 tablespoons lemon juice
1 to 1 ½ teaspoon red chili powder (paprika, adjust to taste)
1 to 1 ½ teaspoon biryani masala powder (or gram masala)
¼ to ½ teaspoon green cardamom powder (or elaichi powder)
¾ teaspoon salt (I used 1 ¼ tsp pink salt)
Whole spices for rice
7 cups water
1 to 1¼ teaspoon salt (I used 1 ½ tsp pink salt)
1 teaspoon oil
1 bay leaf (tej patta)
3 inch cinnamon piece (dalchini)
6 cloves (laung)
4 green cardamom (elaichi)
1 star anise (biryani flower)
1 black cardamom (optional)
2 strands mace (javitri) (optional)
½ tsp caraway seeds (shahi jeera) (optional)
INSTRUCTIONS
Make fried onions for Chicken Hyderabadi biryani
Slice onion thinly, separate the layers and set aside.
Heat 4 tbsps oil or ghee in a deep pan.
Fry the onions stirring often until deep golden to brown.
Do not burn else they turn bitter. Remove them from oil &
Set aside.
Cool & pour this oil to the marinade later.
Marination
Add yogurt, salt, turmeric, chili powder, biryani or gram masala powder, cardamom powder, green chilli, ginger garlic paste & lemon juice to a mixing bowl. Mix well & taste this. If needed add more salt or spice.
Next add in chicken & marinate for 2 hours to overnight for best results.
Overnight marination in fridge yields best soft succulent
Chicken.
Cooking rice
Wash rice till the water runs clear. Soak for 30 minutes. Drain & set aside.
Heat 6 to 7 cups water in a pot. Add 1 tsp oil, whole spices & salt.
Taste this. The water has to be slightly salty.
Boil water rapidly for 5 mins to release the aroma of spices.
Add rice & cook till it is ¾ or 75% done.
The center of the rice must be still slightly uncooked.
Do not make the rice mushy. Drain off to a colander.
How to make Chicken Hyderabadi Biryani
While the rice cooks, transfer marinated chicken to a heavy
Bottom casserole or non-stick pan.
Add oil, ½ of the fried onions, mint & coriander leaves. Mix & spread chicken in a single even layer.
Layer the cooked rice evenly, sprinkle fried onions, mint &
Coriander leaves over the chicken.
Sprinkle ¼ tsp masala powder. Pour the saffron milk all over & then ghee.
Cover the pot with a foil to trap the steam or Dum. Then
Cover with a tight & heavy lid.
To bake Chicken Hyderabadi Biryani in Oven
Bake for 30 to 40 mins at 390F or 200C in a preheated
Oven. The timings will slightly vary depending on the depth
Of the casserole/pot used. Once done, if the chicken is too moist then bake for another 10 mins.
To dum cook on stovetop
Place this over a thick hot griddle or tawa. Set the flame to medium high such that the flame reaches all over the
Diameter of the casserole. Cook this way for exactly 20 mins.
Reduce the flame to lowest. Cook for exactly 15 mins. Off
The flame. Rest for 20 to 30 mins.
Garnish Chicken Hyderabadi biryani with fresh chopped coriander
Leaves & serve with raita.
NOTES
If you do not like to bite in the spices, then tie up all the whole spices for rice in a muslin cloth. Add this to the rice pot.
Do not use sour curd or flavoured yogurt.
To Brown the chicken – The last 5 mins cook the biryani on a medium high flame. This gives browned chicken. To prevent charring you can check the chicken at the bottom before you do this.
If you do not like to use a cloth for trapping the steam or Dum, you can use dough to seal the lid of the utensil. But cleaning up the mess is difficult. An aluminum foil too works.
